
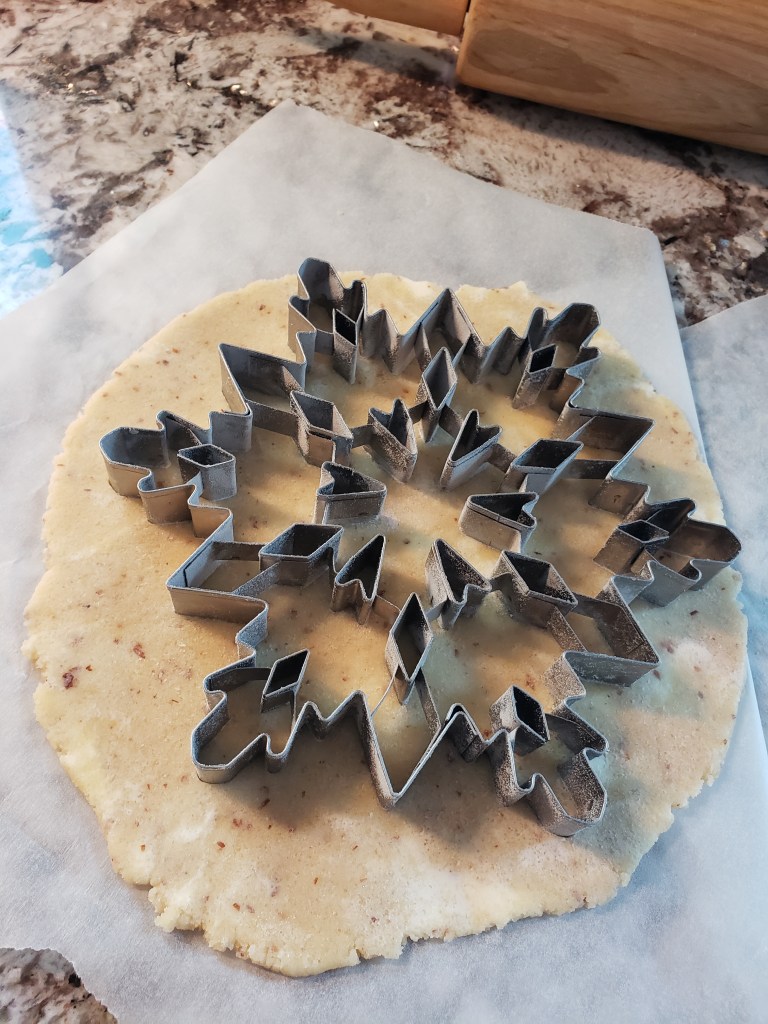
I was searching for the perfect recipe for cut-out cookies since I purchased this incredible 7-inch snowflake cookie cutter on Amazon. I found so many delicious sounding recipes, I could hardly make up my mind, but one just kept haunting me: the Amaretto Cookies from Lisa Marietta Gianotti. While using her recipe, this page focuses on the notes for how to use a giant cookie cutter with this delightful cookie dough.
These are sheer perfection! You don’t need to adjust the recipe to taste. Click on the link above or follow the instructions below (taken directly from her page):
“Combine all of the ingredients, except the colored sugar (it’s an option).
- 2 1/2 cup all-purpose flour
- 1 cup sugar
- 1 egg
- 1 cup sweet butter, softened (2 sticks)
- 1 tsp. baking powder
- 2 1/2 Tbsp. amaretto
- Colored sugars (optional)
Beat at low speed, scraping side often, until well mixed. Cover and chill until dough is firm enough to roll out. Preheat oven to 400 degrees. Roll out 1/2 of the dough on floured surface.
Using a cookie cutter, cut desired shapes. Sprinkle on sugar and bake 6 to 10 minutes, until edges are lightly browned. Cool and decorate.”
As mentioned, the above comes directly from Lisa Marietta Gianotti’s page. Below are my notes regarding using this dough with my giant snowflake cookie cutter.
MY NOTES on the recipe above:
- I love sanding sugar, raw sugar, or any chunky granules that sparkle on top. I prefer sugars with natural colors, especially with a recipe that is as scrumptious as this.
- I added a tablespoon of Almond extract on top of the Amaretto just because I had just purchased it, it smelled incredible, and I wanted to use it.
- Use real butter. Don’t bother if you’re not going to use the real thing. It makes a huge difference in taste, texture, and holding the shape.
- Chilling the dough after rolling flat and then after cutting the shapes helps the dough hold the shape better.
- Do some test batches to see how far to push the cooking. I thought I’d nearly burned a batch because they were as dark as gingerbread. The depth of flavor of those, though, WOW! Next batch, I will push nearly to that depth again.
Giant Cookie Cutter – Lessons Learned


I learned quite a bit using this cookie cutter after doing a dozen batches.
I tried a few methods with a bunch of batches using only the Amaretto cookie dough so I could determine the results as accurately as possible. I tried freezing the dough, chilling the dough, flouring the cookie cutter, freezing the cookie cutter, cooking on silpat mats, cooking on parchment paper, and other variations.
What worked best for me was rolling out the dough between two sheets of parchment paper to 1/4″ thickness and putting the whole shebang in the freezer for about 5 minutes. I put the cookie cutter in the freezer as well and then used rice flour to dust it before cutting the cookie.
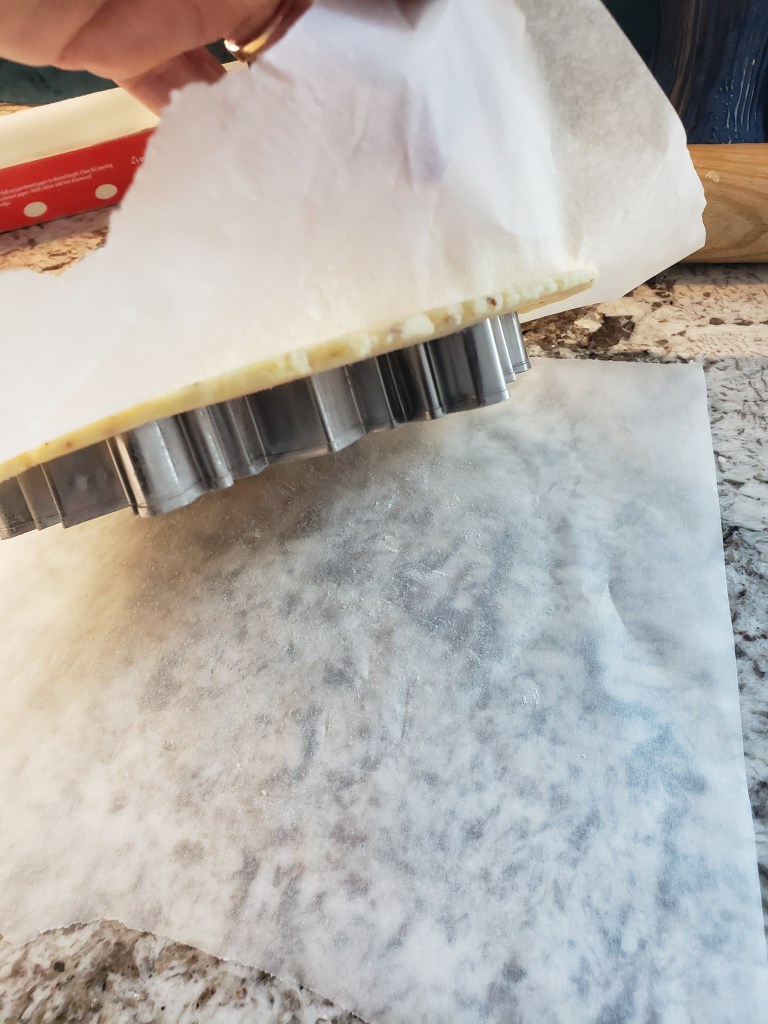
To cut the dough, I pushed the cookie cutter down into the dough as you would normally do, then, I flipped the dough and cutter upside down (cutter on bottom and sheet of parchment with dough on top, see picture above). The dough is cold and hard so it won’t flop over. I then took a rolling pin and rolled on top of the parchment until I could see the cookie cutter design below.
Next, I started peeling off the parchment carefully so that the cut dough stayed inside the cutter and the outside dough stayed with the parchment. Then I flipped it over so the dough was on the bottom and took the fat end of a chopstick and gently pushed the dough away from the tips. This is the part where you have to be careful, and it took some practice. I ruined one cookie, but oh well, it wound up being our taste testing cookie.
As I peeled away the cookie cutter from the dough, I left the dough on (1) a silpat and then (2) parchment paper. The cookie did much better on the PARCHMENT paper as the silpat left the dough a little moist and less cooked than the parchment did. This meant that a cookie this large crisped up on the parchment faster than the silpat significantly faster (maybe 30 minutes faster).
Be careful when removing the cookie from the silpat as the center of the snowflake may crack if the dough is soft-cooked. That’s what happened to me, so I cooked the rest on the parchment paper. Since I wanted snowflakes that we could pick up and not flop over, I baked the rest of the batch on parchment paper.
The addition of dusting sugar on the top just made this cookie Over The Top! Everyone was drooling for more. I had originally thought I’d be decorating this cookie with some pretty icing and some candy beads, but this needs NOTHING beyond what is described above.

You must be logged in to post a comment.